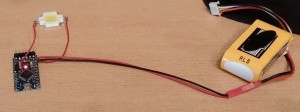
Heute mal wieder DIY
Hab ja noch dieses Laptopakkupack. Da ist auch eine Elektronik drin. Schaun mer mal – oh zwei MOSFETs im SO-8-Gehäuse! Nice!
Da bau ich doch mit nem Arduino einen voll-programmierbaren 10W-LED-Flasher – LEDs liegen ja noch rum (kosten nur 50 Cents bei Banggood)
Da wirst du blind! Der kleine MOSFET ist ein TPC8018, 3,9mOhm. Nettes Teil! Einfach auf den Arduino pro mini draufpacken Pin 2 und GND (für Source). Die LED hängt mit RAW auf 12V (3s-LiPo)
https://vimeo.com/142752748
Code, einfach Blink-Beispiel modifiziert:
// the setup function runs once when you press reset or power the board
void setup() {
 // initialize digital pin 13 as an output.
 pinMode(13, OUTPUT);
 pinMode(2, OUTPUT);
}
#define ONTIME 40
#define BETWEEN 100
#define INTERVAL 1800
// the loop function runs over and over again forever
void loop() {
 digitalWrite(13, HIGH); // turn the LED on (HIGH is the voltage level)
 digitalWrite(2, HIGH); // turn the LED on (HIGH is the voltage level)
 delay(ONTIME); // wait for a second
 digitalWrite(13, LOW); // turn the LED off by making the voltage LOW
 digitalWrite(2, LOW); // turn the LED off by making the voltage LOW
 delay(BETWEEN); // wait for a second
 digitalWrite(13, HIGH); // turn the LED on (HIGH is the voltage level)
 digitalWrite(2, HIGH); // turn the LED on (HIGH is the voltage level)
 delay(ONTIME); // wait for a second
 digitalWrite(13, LOW); // turn the LED off by making the voltage LOW
 digitalWrite(2, LOW); // turn the LED off by making the voltage LOW
 delay(INTERVAL-2*ONTIME-BETWEEN); // wait for a second
}
